Disclosure: This post may contain affiliate links, meaning we get a commission if you decide to make a purchase through our links, at no cost to you. Please read our disclosure for more info.
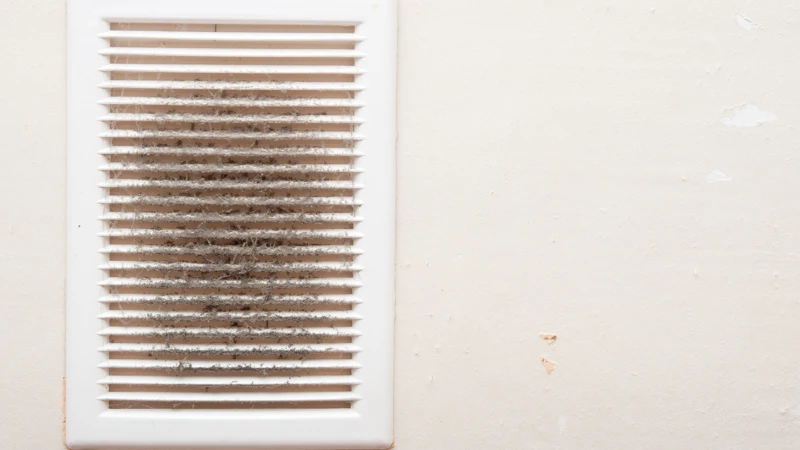
The vent covers are an essential part of the HVAC system. They attract dust particles from the heating and cooling system, containing other harmful particles. If not cleaned, the air vents can release some of these particles into the air you breathe.
Homeowners who don’t know how to clean air vent covers suffer allergies by breathing harmful pollen grains and other particles. The good news is you can DIY vent cover cleaning. Ensure you have the right brushes and detergents, and follow this guide.
Although cleaning the vent covers can be tedious, time-consuming, and costly, homeowners suffer fewer allergic reactions and breathe clean air afterward. You should also inspect the vent covers to know when to clean them.
When you know how to clean air vent covers in house or apartments, chances are that your air vents will function efficiently. But before we look at how to clean air vent covers, let’s first check out the benefits you get after cleaning the vents.
In This Post:
Benefits of Cleaning Air Vent Covers
Most homeowners are reluctant to clean the vent covers because it takes time and energy, but it is necessary. If you don’t have free time to DIY vent covers cleaning, you can hire Clover Services to clean your ducts. Whether you hire a duct cleaning service or DIY the vent covers cleaning, you will enjoy these benefits;
1. Fewer Allergies
Dirty vent covers have a lot of dust particles that contain other allergens and contaminants. When these harmful particles make their way into the house, they cause breathing problems to the occupants.
Family members will get more asthma attacks, and others could get new allergic reactions. Cleaning the covers does away with the dust mites and pollen, reducing the allergic attacks on family members.
2. Clean Air
Sometimes you will feel the smell of dust in the rooms, and you could start coughing when you breathe the dusty air. Dirty air also makes the house uncomfortable to live in.
Also, since the dust on the vents contains particles of fur and mold, it begins to stink. The odor starts spreading to other rooms, making the air unpleasant. DIY vent cover cleaning removes any sources of odors making the air clean.
3. Improves AC Energy Efficiency
Air ducts with blocked vents are not efficient, which causes some parts of the system to work harder. These parts could break or become less efficient, and when the machine works harder, it spends a lot of energy.
When cleaning the vent covers, ensure you also clean the parts of the HVAC system. Regular maintenance ensures all the parts are working correctly and that the machine is efficient, hence, lower energy bills due toenergy efficiency.
4. Reduce Dust In The Home
You might not notice tiny dust particles on the couches or carpet, but they are there thanks to the dirty vent covers. These dust particles cause permanent damage to white fabrics when they leave stains on the linen.
Cleaning the vent covers removes all the dust and dirt, keeping your couches and carpets safe. Besides, the cleaners should also clean the HVAC to remove any dust particles that have settled in and ensure no dust in the home.
What is the Best Way to Clean Air Vent Covers?
Once you know the benefits of cleaning the vent covers, you will be more willing to clean the vents. If you are doing it for the first time, don’t worry because this step-by-step guide will simplify things. But first, get your tools ready;
- Bristle scrub brush
- Dish soap
- Gloves
- Screwdriver
- Vacuum with hose attachment
The Cleaning Process
Here are the steps on how to clean air conditioner vent covers.
Step 1: Switch Off the HVAC and Remove the Vents
Turn off the main power supply to the air conditioner. It ensures no electric shocks and protects your HVAC from power damage. Once the power is off, remove the vents using the screwdriver.
Removing the vents is necessary because they are easier to clean and air dry when unattached from the vent. You might require a specific screwdriver, depending on the type of vents and screws you have.
Step 2: Wash the Vents
Put the vents you removed in a bathtub or bucket full of warm soapy water. You can use dish soap with a degreaser or any detergent suitable for cleaning the ducts. If they are too dirty, let them soak in the water for about 15 minutes before scrubbing them.
To remove dirt from hard-to-reach areas, use a bristle scrub brush. To reach the vent grates, you’ll need a narrow brush. For the deeper areas, you can alternatively use a brush with thin, long bristles.
Once the dust and dirt have been washed away, rinse the vent covers under warm water and dry them.
Step 3:Vacuum the Ducts
Congratulations on cleaning the vent covers, but the cleaning does not end here. You should also vacuum the ducts using the vacuums with a hose attachment to suck all the dirt. It ensures the elimination of all the cobwebs, dust particles, and crumbs from the HVAC.
Leaving the ducts uncleaned will lead to a fast accumulation of dust on the vent covers. Also, ensure you empty the vacuum in faraway places to ensure no dust gets back into the vents.
Step 4: Install the Vents
Once the vent covers dry, you can return them to their places. Wet vents will air dry later when you turn on the HVAC. Ensure you screw in the covers ideally to avoid falling and protect the entry of insects and rodents into the HVAC.
Step 5: Turn On the HVAC
Replace the furnace filter and switch on the primary power source. The HVAC will start running, and you could notice a difference in the sound or quality of the air. You have a clean system and vent covers.
Final Words
Cleaning the vent covers is one of the last things homeowners worry about. However, keeping the dusty vents can lead to allergic respiratory problems and discomfort in the home. If you are unable to DIY vent cleaning, it is safer and more efficient to hire a professional. Thankfully, this guide has taught you how to clean air vent covers.


