Disclosure: This post may contain affiliate links, meaning we get a commission if you decide to make a purchase through our links, at no cost to you. Please read our disclosure for more info.
Make your properties stand out from the rest.
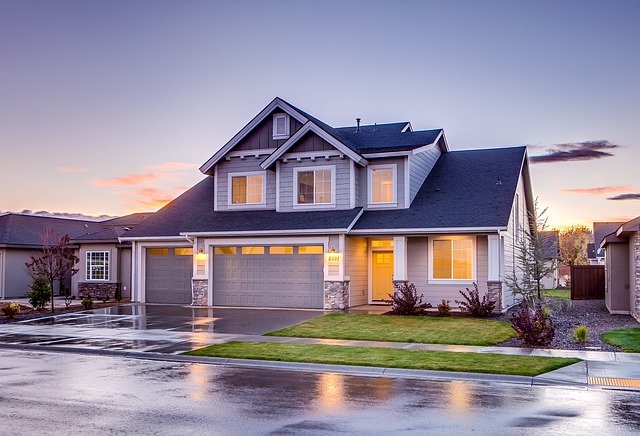
When someone looks at your property portfolio, the first thing they see is the photo. They do not look at the number of rooms or the meters of surface, but in the photo. You are imagining what it would be like to live in that house before you even know whether or not it is in your best interest to buy it.
The photographs of a property are the most important thing to capture the attention of your visitors, because it is the first thing they will pay attention to. And taking photos that really impress is not easy.
In This Post:
- Photos of a Property Are Very Important
- What Is the Importance of Real Estate Photography?
- How to Take Better Photos of a Home
- The Preparation
- 1. Remind the Owner to Leave Everything Clean
- 2. Make Sure to Clean Before the Session
- 3. Do Some Home Staging
- 4. Use a Camera With a Good Sensor
- 5. Use a Tripod for Clarity
- 6. Avoid Window Contrast
- 7. Adjust the Brightness and Contrast
- 8. Highlight the Main Differentials of the Property
- 9. Choose the Angle That Best Favors the Spaces
- 10. Enhance the Colors
- Start Taking Better Real Estate Photos
Photos of a Property Are Very Important
Having a good portfolio of properties is useless if you haven’t taken good pictures.
When a person looks for a house, they look at dozens or hundreds of properties, one after the other. And if you do it through a real estate portal such as tajarat.com.pk, you will do it at great speed. After all, people don’t have time.
And after an hour, all the houses you’ve seen will look the same, and you won’t remember most of them.
During the few seconds in which they see your property, the only element that has any chance of capturing their interest is … the featured photo. Everything else is not different at all from other real estate. The numbers and letters are not going to differentiate you from the rest.
That is precisely why it is very important that you show the best side of each house you sell.
What Is the Importance of Real Estate Photography?
Google data shows that the internet is the main search engine for those looking for a property to buy or rent. Another comScore Media-Metrix study reveals that more and more Millennials use the internet to find the property of their dreams: from May 2013 to July 2014, web search grew by 30% and the use of mobile devices for this type of research increased by 81% in the same period.
With these data in hand, it is clear the importance of investing in the quality of real estate photography to win the attention of customers on the internet, isn’t it?
In order to get good photographs of the properties available in your real estate portfolio, it is not necessary to hire a specialist in the area, but it is essential to master some techniques and know the profile of the public you want to impact.
Nowadays, with a smartphone it is possible to take good pictures , but it is necessary to follow some essential tips to obtain a satisfactory result. In parallel to this, real estate companies need to invest in better mobile sites and applications, as well as develop a strategic positioning on social networks.
Continue reading this post for practical tips on how to take good real estate photographs and leverage your results!
How to Take Better Photos of a Home
Taking good photos of real estate is not just a matter of having the best camera – it is the result of combining good technique, post-production, and having a good house to present.
We will take a look at each step of the process, from when you make the visit until you touch up the photos for publication.
The Preparation
The first thing is to prepare the photo session in advance, preferably with a few days to spare.
1. Remind the Owner to Leave Everything Clean
Even if you have the best photographer in the world, it is useless if the house is a mess. Nobody wants to see an impressionable ad, much less imagine what it’s like to live there.
So your first step is to remind the owner to pick up the house. You have probably told them before, but people can be forgetful or not give it enough importance. On more than one occasion, surely you have found that the house was not in a condition to be photographed.
You can solve that with a reminder a day before the session and remind the owner of how important it is to have a clean house. Try including examples of what you hope to find, or even a to-do list to review.
In any case, the important thing is not to waste the trip or the time it takes.
2. Make Sure to Clean Before the Session
Even if the owner has done his homework and has a clean house, you have to make sure that everything is presentable.
Keep in mind that you are at their home, and what is normal for the owner may not be normal for other people.
When in doubt, less is more.
For example, street shoes may be in plain sight, or there may be a stack of books on the coffee table. First of all, he goes to the session with the idea of presenting a totally collected house.
3. Do Some Home Staging
Let’s face it: most homes do not have contemporary furniture, or decoration that is especially elegant. Instead, almost all families have been using the same dishes for years and mixing furniture that they have bought over the years.
To remedy this, you can try bringing in some decorative items, or use what’s on hand to create a scene. The goal here is to do a bit of home staging to present an experience, not a home.
Here are some examples of what you can do:
- Put plates and cutlery on the dining table.
- Adding (fake) plants to the most neglected corners.
- Put cushions and blankets on the sofas.
- Leave books neatly lined up on the table.
general, it is about giving a more presentable look to the house. The amount of effort you put into it will surely depend on the value of the property: it may not be worth doing this for houses under € 100,000, but it is worth it for properties of half a million Euros.
Taking the Photos
Making a comprehensive list of everything to consider during a photo shoot goes a long way, but we’re going to look at some of the most important details – and effective in improving the quality of your photos.
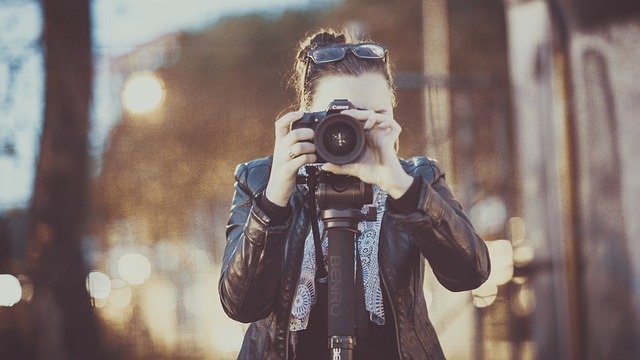
4. Use a Camera With a Good Sensor
The first thing to keep in mind is that your equipment does matter.
The same photos are not taken with a smartphone as with a SLR camera, even if you use the latest iPhone or Samsung Galaxy. If possible, you should have a specially dedicated SLR for home photos.
And Which SLR Camera Should I Use?
There are cameras of all prices and sizes, but the most important thing to consider is the sensor. A camera’s sensor is what absorbs light and turns it into an image, and the bigger it is, the better.
Apart from that, there are many other factors that go into choosing a DSLR camera: the megapixels, the ISO, the lens … but as a rule, the price is what tells you how good it is.
At the very least, you should go for a camera for around € 1000. It sounds expensive, but a top-notch camera will allow you to take high-resolution and much sharper photos.
5. Use a Tripod for Clarity
There are many ways to get a sharper photo – reducing shutter time, compensating with a larger aperture … and so on. But if you are not a photographer and just want to take pictures of a home, you can go easy: use a tripod and a shutter-release button.
With a tripod you get several things:
- Consistency, the usual thing is to take the photos at eye level, to give the same perspective that a person visiting the house would have.
- Stability, because the tripod will prevent the camera from being skewed or tilted. This is something to keep in mind if you want to have a good composition.
- Sharpness, since you will avoid moving the camera when shooting. This is very important to get very detailed photos.
6. Avoid Window Contrast
One of the limitations of cameras (including the human eye) is the difficulty in taking dark and light photos at the same time. And windows are a constant problem during a photo shoot.
In most cases, the windows will be overexposed (too light), or will confuse the camera sensor and obscure the rest of the photo. You can easily verify this problem with smartphone cameras – if you take a selfie against the light, you will see that it is excessively dark.
This photo uses HDR to show the exterior without overexposing the interior.
To fix this, you have several options:
- Take photos on a cloudy or sunny day
- Cover windows with curtains to reduce incoming light
- Use HDR to compose a photo without overexposure
The last one is a more advanced photographic technique, but the others are an easy and relatively simple trick.
In any case, remember that having little contrast in photos helps you show all the details easily. If the photo comes out in low light, don’t worry – you can increase the brightness later.
Photo Retouching for Real Estate
It remains to give the final touch. If you’ve used a good SLR camera, your photos will have plenty of resolution and detail in themselves – but now it’s time to adjust the colors and warmth.
You can use a variety of software programs to retouch photos, but my personal preference is Adobe Photoshop. It is a very versatile tool that can do it all, including easily change photo size.
Once you have your photos in Photoshop, there are a few basic arrangements to do:
7. Adjust the Brightness and Contrast
Many photos of houses tend to come out dark and in low light. This is something natural in houses with few windows or bad orientation, but with increasing the brightness you can solve it:
You See the Difference?
We have simply increased the brightness and reduced the contrast of the photo to bring more life. In this case, reducing the contrast helps to even out the light and dark parts of the image.
Above all, the important thing is to make the house full of life. Nobody wants to live in a dark cave, and even less if the photos are not appetizing.
8. Highlight the Main Differentials of the Property
The photographs will be used as a strategy to attract and delight the customer, right? Because of this, it is necessary that they value and present the best of the property. If he has any differential, be sure to photograph him – a barbecue, a terrace, a fireplace, a huge closet, etc.
By using some of the techniques and tips presented, it will certainly be possible to achieve quality in real estate photography. Keep following the Vista Blog to check out other tips from the real estate market.
9. Choose the Angle That Best Favors the Spaces
Try to shoot from the angle that most favors the environment. There are some tricks that professional photographers use to expand the space in which the photos will be taken. One of them is the rule of thirds, which consists of framing horizontally or vertically what you want to photograph.
To ensure that you will have at least one good photograph of each room, take the photographs from different angles and positions, so you will be able to cover all the corners and details of the property.
10. Enhance the Colors
Another thing you can do to get a better photo is to increase the saturation a bit. In most cases, the photos you take will be low in color and appear dull, with little life. This is where you can give them a more cheerful look.
With saturation, the important thing is to find a good balance between a dull image, and one that looks like a cartoon. It is important to combine it correctly with brightness and contrast to achieve a pleasant result.
Here you can see an example of the difference between low and high saturation. While the image on the left is off and doesn’t have much life, the one on the right is more vibrant. To achieve the effect, all it took was the following:
- Increase saturation
- Reduce contrast
- Increase brightness
- Apply a yellow filter
Start Taking Better Real Estate Photos
Real estate photography is not an easy thing – like any profession, taking good photos requires practice and talent. In fact, all of these tips we’ve seen barely scratch the surface.
If you think you don’t have time to do all this, or it is too complicated for you, it never hurts to hire a professional photographer. It will cost more, but the results will be better, and you will have a much better chance of highlighting your home in overseas block above others.
And you, what do you think?
