Disclosure: This post may contain affiliate links, meaning we get a commission if you decide to make a purchase through our links, at no cost to you. Please read our disclosure for more info.
If you’re looking for how to install vanity lights by yourself then, this guide is all you need, as you’ll find step-by-step instructions on how to do it. So, keep up with the reading game as this is a guide on how to install vanity lights and brings some interesting information related to vanity lights to you.
In This Post:
What Are Vanity Lights?
Vanity lights are a type of lighting fixture designed to be mounted above the bathroom’s vanity. This vanity area of the bathroom usually has a vanity sink, countertop, and vanity mirror.
Vanity lights aren’t used to light the bathroom entirely, or if more appropriately put, vanity lights act as task lighting; however, they can’t illuminate the whole bathroom space on their own.
How to Choose Vanity Lights?
Choosing vanity lights is not only about getting the lighting set up: which has a great illumination, but it’s also linked to the style, size, and shape of the lights, as your bathroom must look appealing with the vanity lights not shabby.
So, to make it easier to choose vanity lights, you can follow the below-mentioned tips on how to choose vanity lights.
1. Focus On the Right Size
Normally, vanity lights have different sizes suitable for different kinds of bathrooms. However, the key to choose the size is linked to your bathroom vanity. Whenever you’re choosing vanity lights for your bathroom, make sure the size of the lights doesn’t exceed the size of the bathroom vanity.
2. Selecting the Bulbs
Many different types of bulbs are available in the market, but if you want even lighting setup then, frosted and opal bulbs will fit the criteria. Moreover, if you want to install less heat omitting, energy-saving, and longer living bulbs, then fluorescent or LED bulbs should be your pick.
These are all some relevant suggestions for selecting the bulbs, but the final decision must be made based on personal requirements and preferences.
3. Style Is Important!
Choosing the vanity lights style for your bathroom may be one of the most interesting parts of this whole process as it connects with you and your personality. Among them, choosing the right type of finish is an important step.
If your other bathroom fixtures have a shiny look then, polished nickel and chrome finishes in your vanity lights will be suitable. Whereas, if your bathroom fixtures have more of a brushed look then, brushed nickel finishes will be the best for vanity lights in the space.
How to Install Vanity Lights
There are several steps to installing vanity lights, and we’ve listed all of them below so that the installation process becomes easier for you.
Step 1
Carefully remove the already installed bulbs and fixtures. After the lighting and fixtures are removed, check for the voltage fluctuations, remove the wire nut and separate the wires. Next, put the wire nut back in its place.
Step 2
When you’ve completely removed the old lighting setup, inspect the area for junction boxes. If you don’t find any behind the walls where the lighting was installed, it’s advisable to install some junction boxes for electrical safety.
Step 3
Now that the new junction boxes have been installed, it’s time to add the base plate. Also, make sure you run the wires through a knock-out hole, and your base plate is levelled either horizontally or vertically, depending on the style of the vanity lights you’re using.
Step 4
It’s time to wire it all together. You can start by wiring the bare copper from inside the wall and the light to the green screw on the base plate. Then, move on to joining the white wires together with a new wire nut, and do the same with the black ones. After this is done, tuck all the wires in the junction box to be exposed.
Step 5
The next step is to mount the new lighting and fixture. Before doing the final tightening of screws and nuts, make sure you loosely tighten them first and level the institutions so the fixtures don’t look disproportionately installed.
Step 6
Now it’s time to flip the turned-off breaker and test the installed lighting with the wall switch.

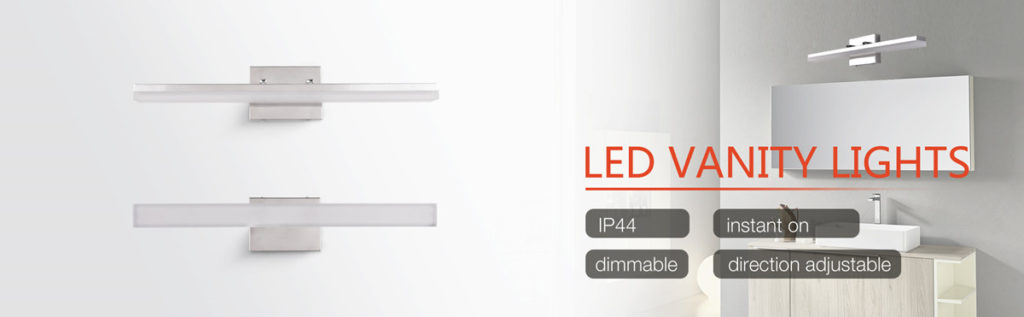
The Best Vanity Lights by Mirrea
Mirrea has specialized in producing high-quality LED lights since its establishment in 2015. In fact, Mirrea was known as a leading brand in decorative lighting because of its unique designs and high-quality products. The best Mirrea vanity lights are J1200-46W.
These vanity lights are brushed nickel-finished dimmable vanity LED lights for the bathroom. They come in two variants J1200-46W(MN) and J1200-46W(B). Both of them are great for a fluorescent touch to the bathroom vanity lighting.
Plus, these emit less heat and are durable and energy-saving lights. Apart from these LED vanity lights, you can check out other models of the vanity LED lights produced by Mirrea on their site and choose the ones best suited to your preferences.
Conclusion
Vanity lights are a must-have in bathrooms to have better illumination on your face and in overall bathroom space. However, sometimes you just want to DIY your way through life and that includes installing vanity lights too.
This article will be perfect to start with on how to install vanity lights as it’s not only about the process of installing vanity lights, but it also gives you more relevant information related to the vanity lights, which I’m sure will be very helpful and informative.